Public Key SSH Authentication in PuTTY
Generating and using SSH authentication keys via PuTTY on Windows is a bit different from using a standard Bash shell in OS X or Linux. Here’s how it works:
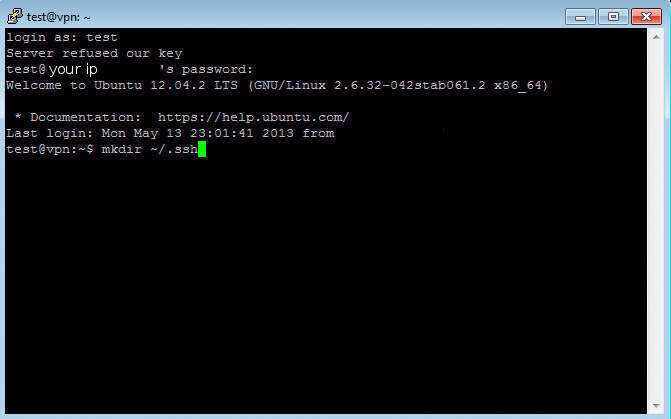
First, connect to your SSH server; see the instructions for connecting via SSH on PuTTY if you haven’t done so yet. Once you are connected with your ssh user, make a new directory called .ssh:
mkdir ~/.ssh
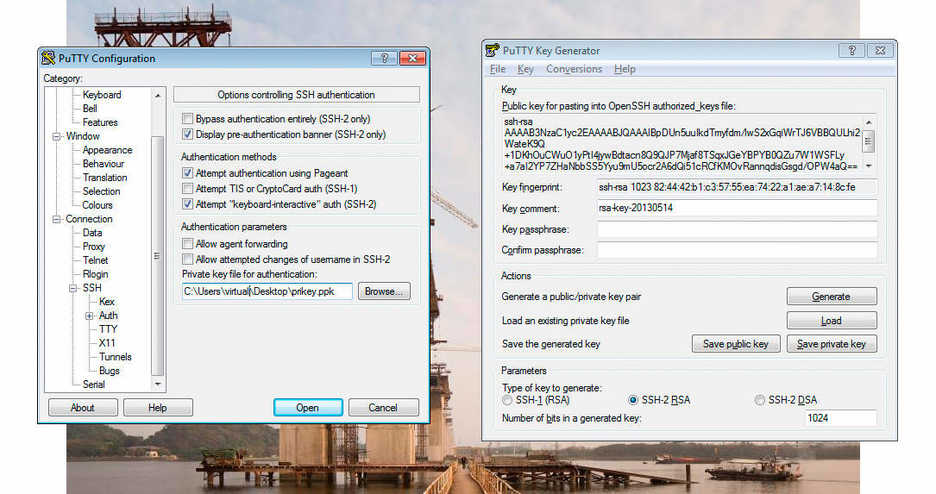
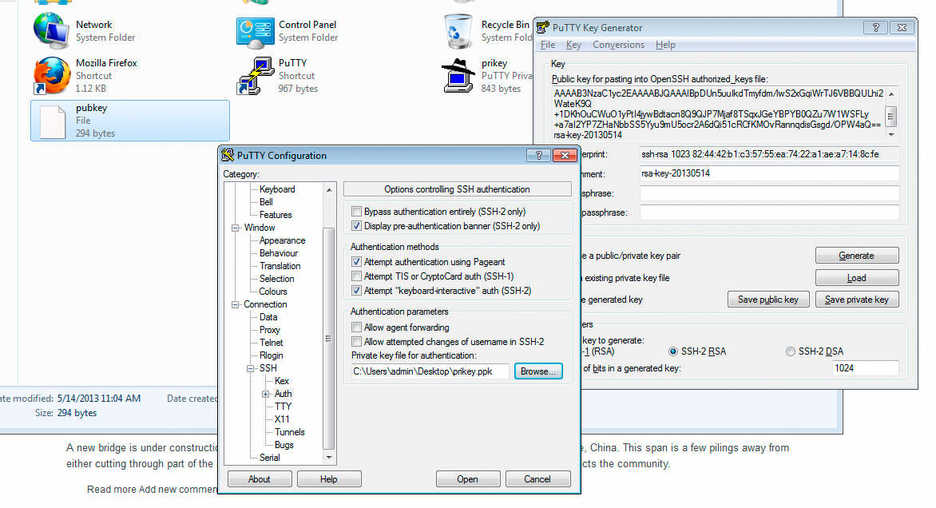
Now open the PuTTYgen key generator from the PuTTY application folder and generate a public/private key pair. Save the keys somewhere (I used the Desktop in this case) but don’t close the window yet.
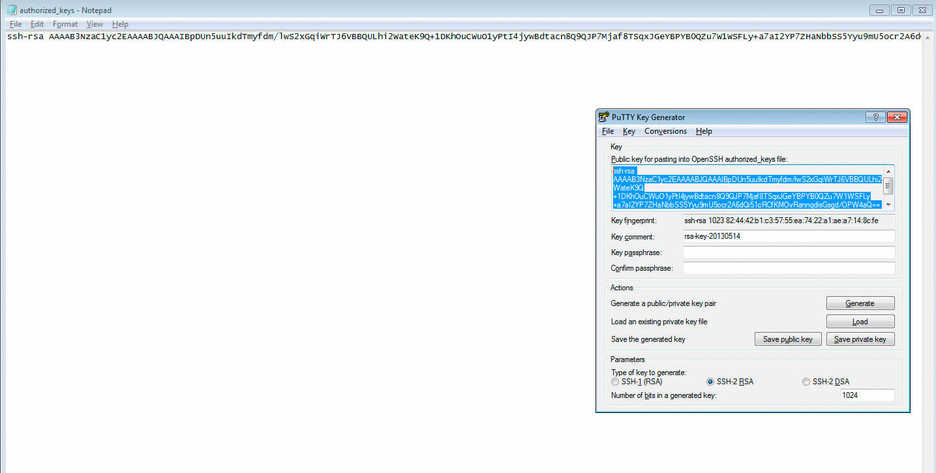
Copy and paste the public key from the key generator box into a plain text file labeled authorized_keys then save that file. Notepad will want to save the file with a .txt extension, which is fine for now.
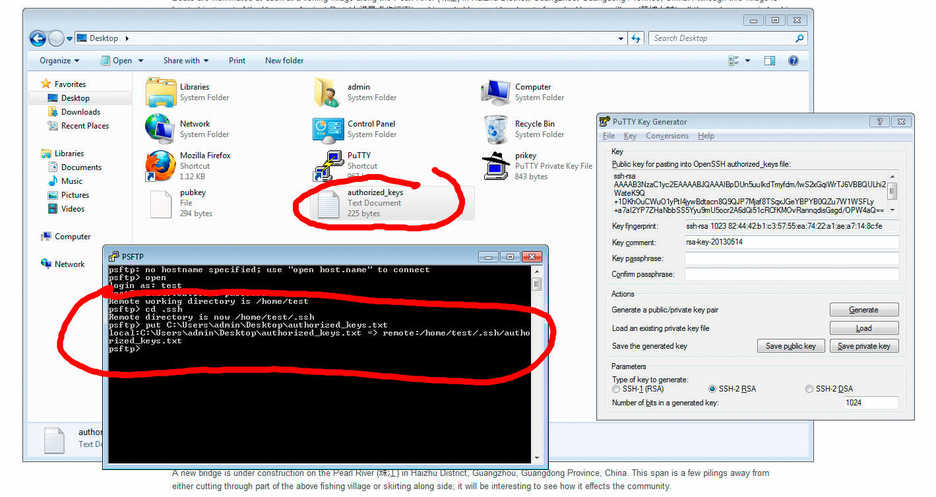
Now use PSFTP (also in the main PuTTY program file) to transfer authorized_keys.txt to the ~/.ssh directory you created on your VPS.
When PSFTP opens, connect to your VPS with your SSH user by entering open 216.34.181.45 (replacing 216.34.181.45 with your server IP address).
Once connected, change to the .ssh directory:
cd ~/.ssh
Transfer authorized_keys.txt by typing put then dragging and dropping your new authorized_keys.txt file onto the PSFTP terminal, which will enter the filename and path for you. Hit enter.
Now rename authorized_keys.txt to authorized_keys:
mv authorized_keys.txt authorized_keys
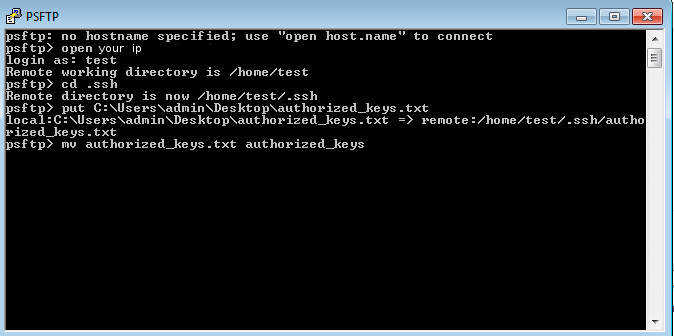
Now you can close PSFTP.
In PuTTY, connect using your keys by setting the private key you created earlier (in Connection > SSH > Auth):
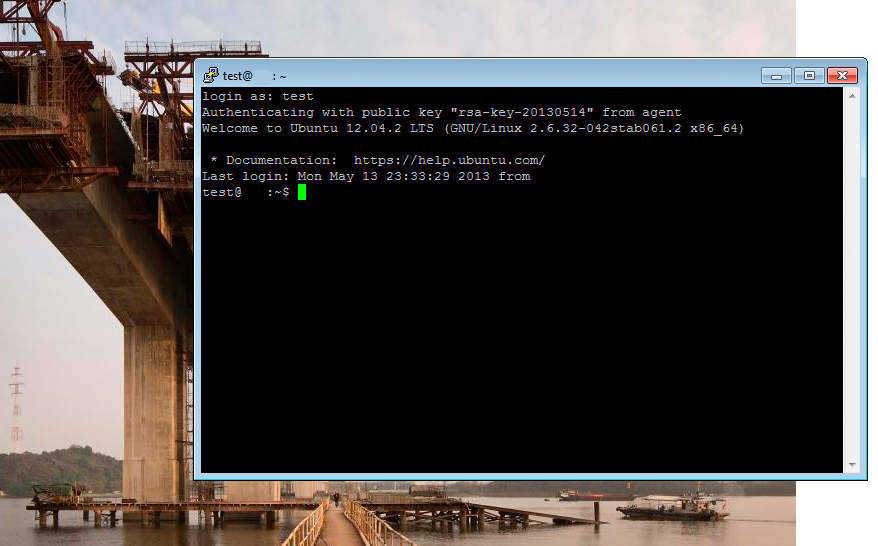
Now when you connect, you should only be asked for your username, not your password.
For PuTTY to remember your SSH settings next time you want to connect, you will need to save them on the main basic settings page:

If you got to this page from the SSH SOCKS server tutorial, be sure to return to that page and continue on with the rest of the security settings.